
Words by Marléna Ahearn and Cara Livermore
Photos by Cara Livermore
In 2010, Cara created hipsterfood on Tumblr to share her vegan story and recipes. The blog found incredible success and she decided to try to make her love of vegan food and photography a business: Chickpea. In addition to her passion-project Chickpea, she photographs for events, weddings, and other projects. She attributes this varied content to her success in pushing past creative blocks—and allows her to get more creative.
Cara's creativity has helped her cultivate five foolproof tips for taking great photos, and she's sharing them with you!
1. Be Thoughtful With Light

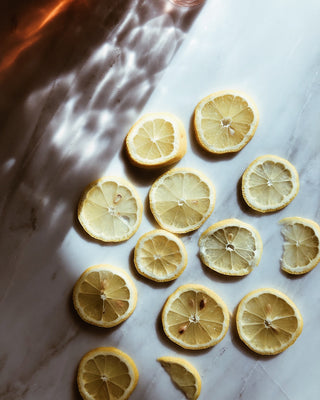
Light changes with different times of day, weather, season, and where you’re located. (Whether in your house, workplace, or a favorite spot outside.) Most shots taken at noon on a cloudy day will look dull and lifeless compared to an hour before sunset as the clouds part after a storm. Photographers’ favorite times of day to shoot are what we call “golden hour” (a bit after the sun rises, and before it sets.) I have an app on my phone called Golden Hour that tells me these times each day, so I plan to shoot for those times, especially if I’m outside.
2. Plan Out Your Shot

This can be as simple or as complex as you like, but preparation leads to more opportunities to shoot. Working off of my last tip, be sure to check the weather for the week, when those golden hours will happen, and how busy you’ll be on any given day. Most people who work during the week ask how to get great shots - work around your schedule to get the best shots. Early morning has great light, as well as sunset, so prepare your material beforehand and shoot when the light is good. Get some inspiration from all different sources (museums, books, Pinterest, movies) for ideas on color, composition, and lighting. Prep the food you’re shooting (or the sewing project, lettering artwork, etc.), then you’ll be ready to make great photos without worrying about the sun going down while you’re still finishing up your subject.
3. Find a Spot to Shoot

For most of us in the winter, we’re shooting indoors, but this applies to outside as well. You’re looking for a controlled spot to shoot, like near a window or under a tree. (I’ll stick with the indoor spot for now, since I’m not normally shooting outside in the snow.) Even if you just have one window, you can make amazing work. When it’s especially dark, you’ll need to get right up next to it; I’ve done my fair share of shooting food as the sun is setting, right next to the window. Take a look at different rooms in your house, and where the windows are. (A compass/compass app helps here!) Is it a South, North, West, or East facing window? Southern light is the longest lasting and the strongest. Northern is a bit dimmer, but it’s even throughout the day. Western and Eastern are great for getting strong, gorgeous light in sunset and sunrise, respectively. Some rooms work better at certain times of day, so take advantage of that!
4. Use Simple Tools to Change Up Natural Light

I use foam core boards that you can get at any craft store, but you can use any dark and light surfaces you have. (My favorites are baking pans, or placing my subject near a dark or light wall.) Use white boards to reflect light onto dark areas of your shot, or black boards to add contrast and block the light. Use sheer fabric or parchment paper to diffuse the light, which gets rid of harsh shadows and bright spots. Use blinds to control the amount of light coming into your space. One window, in many cases, is better than a ton of them, because it is more focused light to really show off the texture and contrast of your image.
5. Experiment and Have Fun!

Finding the best light, especially in winter, can be a sometimes frustrating learning experience. Keep looking to how others use light in their shots and examine what direction it’s coming from, what time of day you think it was, and what tools they probably used to make it happen. But when you’re actually shooting, just keep trying new things and you’ll find soon what works for you. Put on some fun music, grab a friend to help model for you, and make it an enjoyable lesson!
Try out these tips (and more!) at one of Cara’s upcoming photography classes.